
Academy › Website Builder › Lesson 1
~3 minBeginnerYour first 5 minutes in the Builder
Sign in, meet your dashboard, create your first project, and learn where everything lives in the workspace.
Step by step
Follow along
- Go to starreach.ca/build.
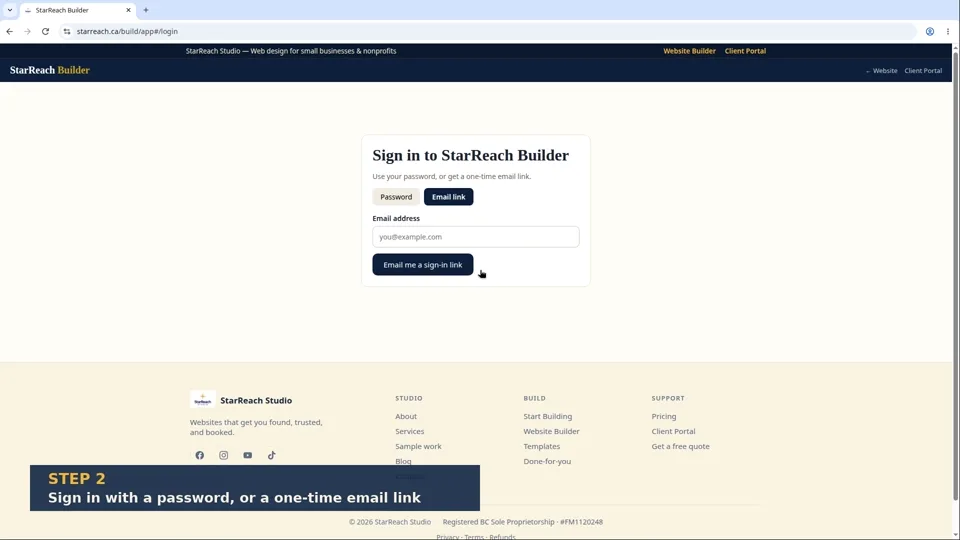
- Go to starreach.ca/build. You'll see two tabs: Password and Email link. With Password, enter your email and password to sign straight in. With Email link, enter your email and click Send sign-in link — check your inbox and click the link; it's single-use and expires in 15 minutes.
- You'll land on your dashboard. Think of it as home base: every website you build shows up here as a project card. If you're brand new, it'll be empty. That changes in about thirty seconds.
- Click + New project.
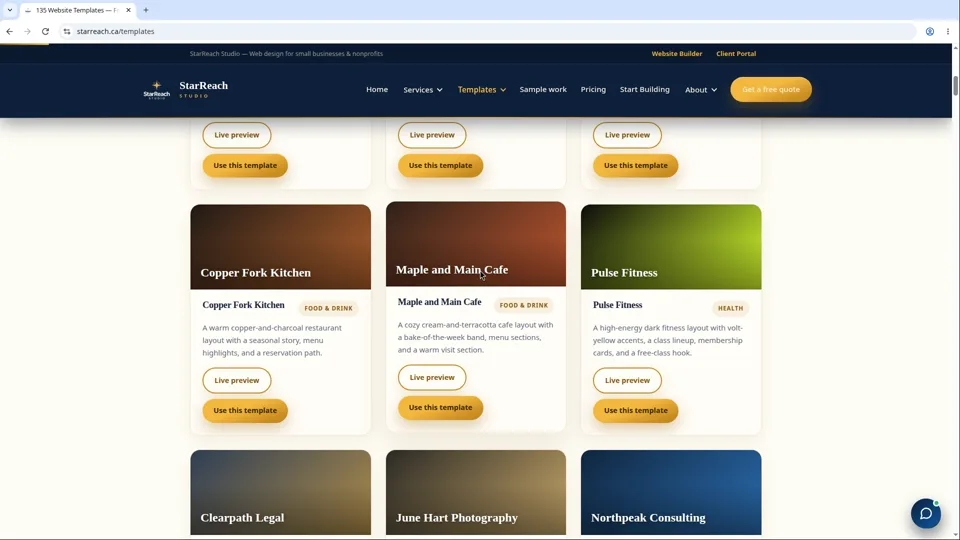
- Choose how to start — there's no wrong answer: Chat with the Star AI builder. Describe your business in plain words: what you do, who you serve, the feel you want. Your starter site appears live next to the conversation. Pick a template. Browse 135 templates across 8 categories — restaurants, salons, trades, health, nonprofits, and more. Each is a complete multi-page site with real copy and photography. Preview any of them, then click Use this template.
- Give your project a name you'll recognize later.
- Take thirty seconds to learn the workspace layout: Left panel: your pages and sections, listed top to bottom — the skeleton of your site. Center: the live preview canvas — what you see here is what your visitors will see. Toolbar and tabs: tools for adding sections, editing content, adjusting your brand, plus tabs like Templates and Inbox.
- Relax: everything you do happens on a private draft. Nothing is live, and nothing can break your public site, because there isn't one yet. Your work saves automatically as you go.
From the video
Key moments
Read the full video transcript
Welcome to the StarReach Builder. In the next three minutes, you'll go from signed out to standing inside your first project — knowing exactly where everything lives.
First, sign in. Head to starreach.ca/build and enter your email. We send you a secure sign-in link. No password to remember, no account to set up. Click the link within fifteen minutes, and you're in.
You'll land on your dashboard. This is home base. Every website you build shows up here as a project card. If you're just starting, it'll be empty. That's fine. That's about to change.
Click New Project. Now you choose how to begin — and there's genuinely no wrong answer.
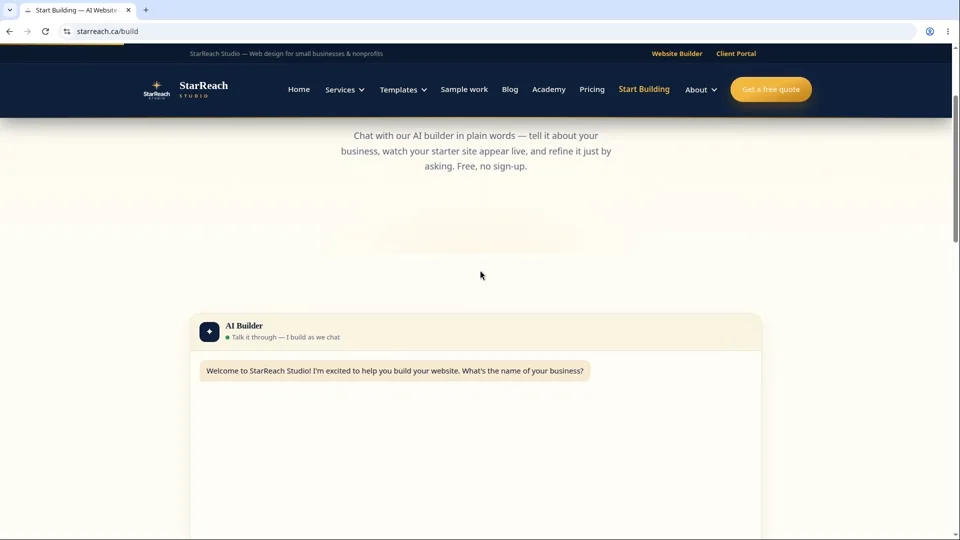
Option one: chat with our Star AI builder. Just describe your business in plain words. What you do, who it's for, the vibe you're going for. As you talk, your starter site appears live, right beside the conversation. It's honestly a little bit magic the first time.
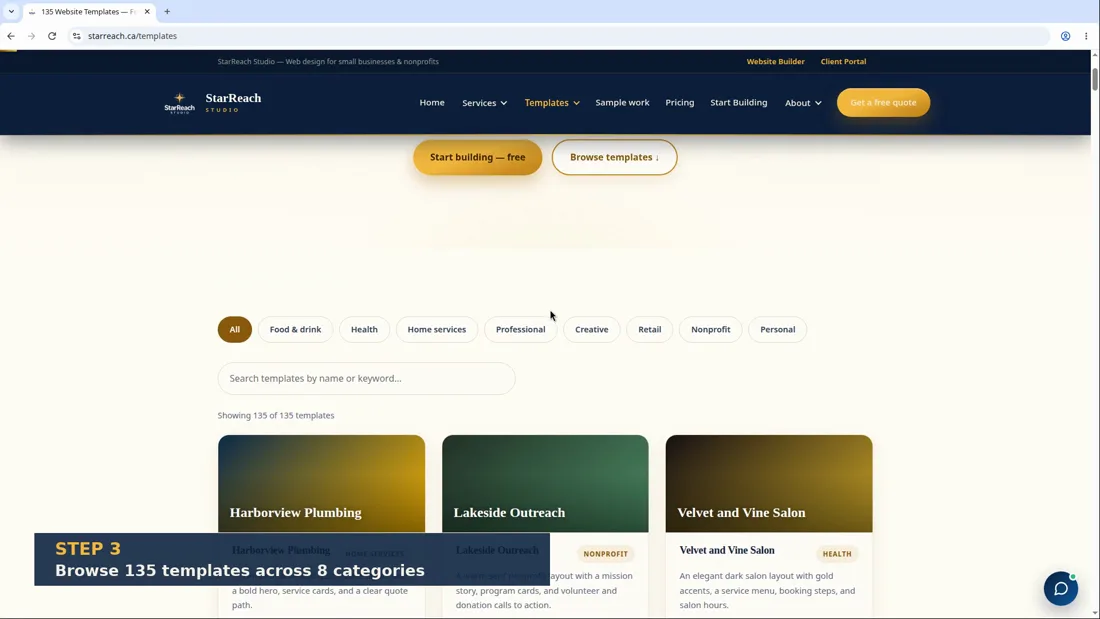
Option two: pick a template. We've built over a hundred and thirty of them, organized by industry — restaurants, salons, trades, health, nonprofits, and more. Every template is a complete multi-page site with real copy and real photography, not lorem ipsum. Find one that feels like you, preview it, and hit Use this template.
Either way, you land in the workspace. Here's the lay of the land.
On the left: your pages and sections, top to bottom. That's the skeleton of your site. In the middle: the big live preview. What you see is what your visitors will see. Around it: your tools — add sections, edit text, swap images, tune your brand.
And here's the thing to remember: you cannot break anything. Everything you do happens on a private draft. There's no live site to mess up.
Your work saves as you go. So explore. Click things. In the next lesson, we'll cover the one idea that makes everything else click: the difference between your draft and your published site.
Written walkthrough
The whole lesson, in writing
This page is the written version of your first five minutes: sign in, start a project, and learn where everything lives. Every name below — tabs, buttons, panels — is the one on the screen in the current Builder, so you can follow it click for click without the video.
- Sign in at starreach.ca/build. The sign-in card, headed “Sign in to StarReach Builder”, offers two tabs. Password: enter your email and password and click Sign in — the Show button lets you check what you typed, and Forgot password? is there if you need it. Email link: enter your email and click Email me a sign-in link; the link that arrives works once and expires in 15 minutes. Brand new? Click Create one, give an email, a display name and a password, and you are in immediately.
- Land on the Builder home. This is home base, headed “Your websites”. It holds your organization, your projects, and an App Studio panel. A brand-new account reads “No organizations yet — create one to get started.” Create the organization first — your business name and the Create button — because projects live inside it. Under Projects you will then see the invitation: “No projects yet. Create your first one — it takes a minute.”
- Start the project. Click + New project. A short form opens on the page — not a new screen — asking for a Project name (the placeholder suggests “e.g. Acme Bakery website”), your Business name, and the Business type (“e.g. Bakery, Plumber, Salon”). Click Create project. Name the project something you will recognise in a list a year from now; you can have several projects under one organization.
- Meet the guided setup. Creating a project opens the guided setup, a five-step path shown across the top: 1 Business, 2 Template, 3 Content, 4 Domain, 5 Publish. You move forward by finishing each step rather than clicking ahead, and the Guided setup button in the workspace brings you back here any time. Step 1, “Tell us about your business”, asks for your business name (required), what kind of business it is, what the website should achieve, your services or products — add as many as you like — plus your city or area, phone, email, address, and anything else we should know. Respect the honest note printed on the form: do not include testimonials, statistics or prices unless they are real and yours — the AI is not allowed to invent them. The step ends with the Generate my website button.
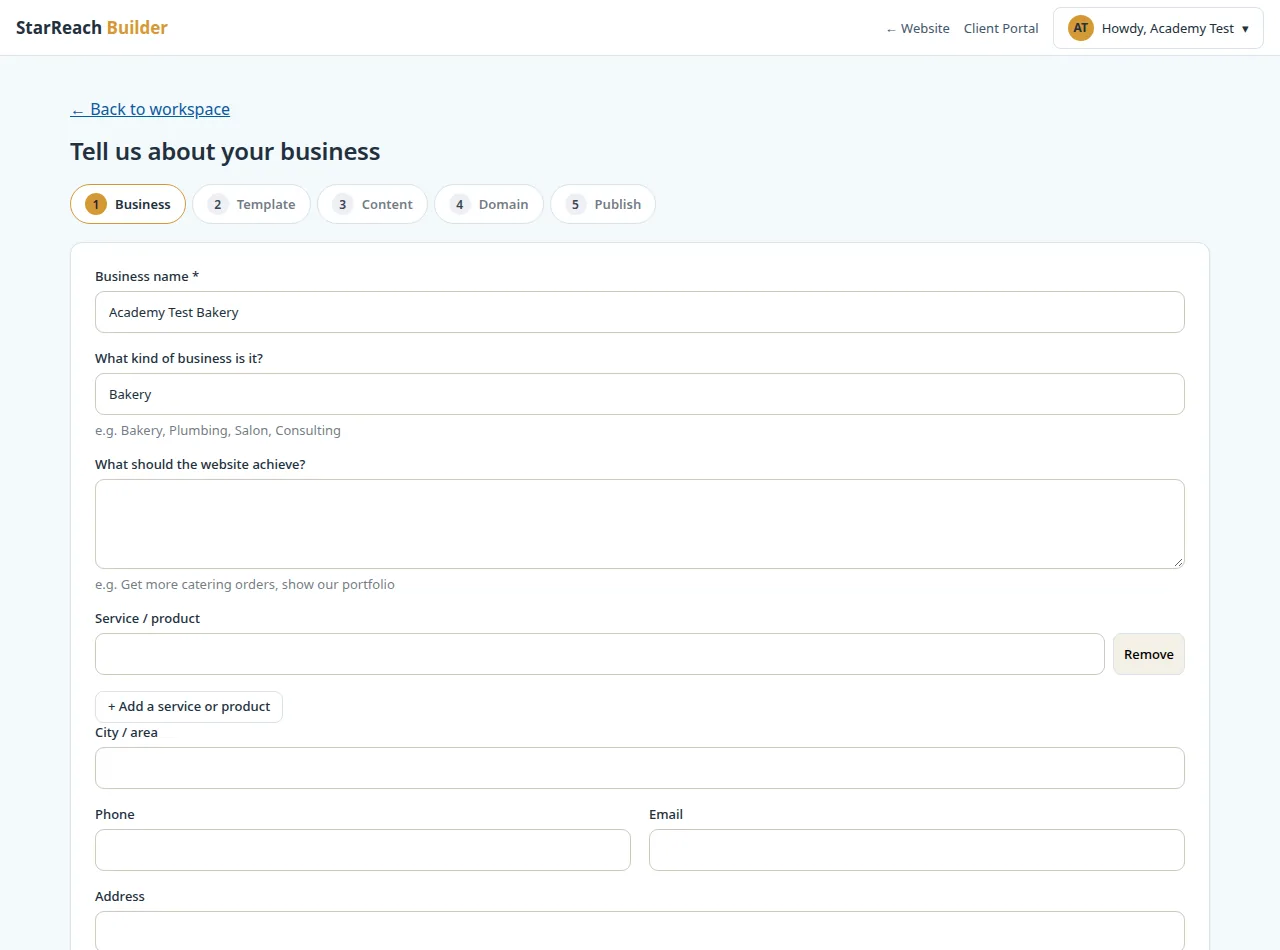
Step 4 — Guided setup, step 1 of 5. The rail across the top is your map for the whole setup. - Or start from a template. In the workspace sidebar, Templates opens the Template studio: 224 designs in 9 categories — Home services, Nonprofit, Health, Food & drink, Professional, Creative, Retail and Personal — with a search box that suggests “try ‘bakery’, ‘dentist’, ‘yoga’…”. Every card carries two buttons: Preview and Use this template.
- Preview before you commit. Preview opens the template as a real, working site in a window titled “Live preview”. Switch it between Desktop and Phone at the top, walk its pages from the menu at the bottom, and take your time — the bar at the bottom promises “Preview only — nothing is saved.” When a design feels like your business, Start with this template (or Use this template on the card) is the point of no return — and even that comes with a safety net, next step.
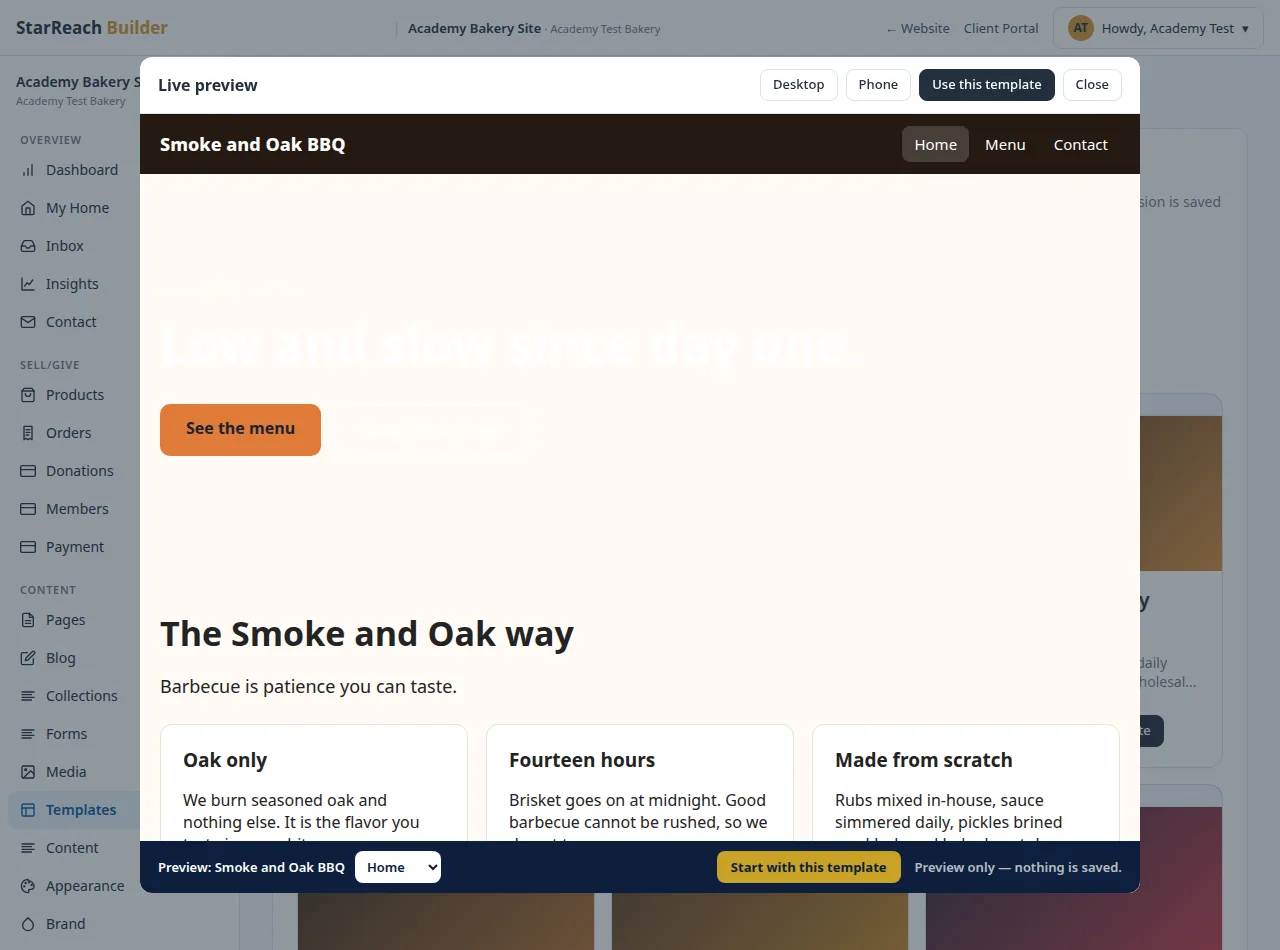
Step 6 — A template’s live preview. Nothing is applied until you choose to start with it. - Applying a template is safe — and checked against your plan. Choosing a template asks you to confirm, because your current pages and sections will be replaced — but a version is saved first, so you can always undo, and the message afterwards confirms it: “Template applied — here’s your new site. Your previous version was saved.” One real limit: the design’s page count must fit your plan — up to 5 pages per site on the trial and Starter, 15 on Growth — and an oversized template is refused with a message that names both numbers.
- Learn the workspace layout. Open your project and look at the left sidebar; everything is grouped. Overview: Dashboard, My Home, Inbox, Insights, Contact. Sell/Give: Products, Orders, Donations, Members, Payment. Content: Pages, Blog, Collections, Forms, Media, Templates, Content, Appearance — plus Brand and Logo Studio. People: Team. Grow: Automations and App Studio. Settings/Developers: Hosting, Upgrade, Developers, Tools, Settings. Along the bottom sit five actions you will use constantly: Preview, Review, Backups, Export and Publish. At the top you will find Undo and Redo. The project Dashboard’s “At a Glance” card always tells you your page and section counts, your status — draft, until you publish — and your role.
- Edit on the canvas. Open Pages, choose a page, and the live canvas appears: your site exactly as visitors will see it, with Desktop, Tablet and Phone switches above it and a page selector beside them. The tip printed under the canvas is the whole editing method: “click any block in the preview to edit it.” A Refine with AI panel offers one-click suggestions when you want a second opinion. Everything here is a private draft — nothing is public until you publish — and your work saves as you go.
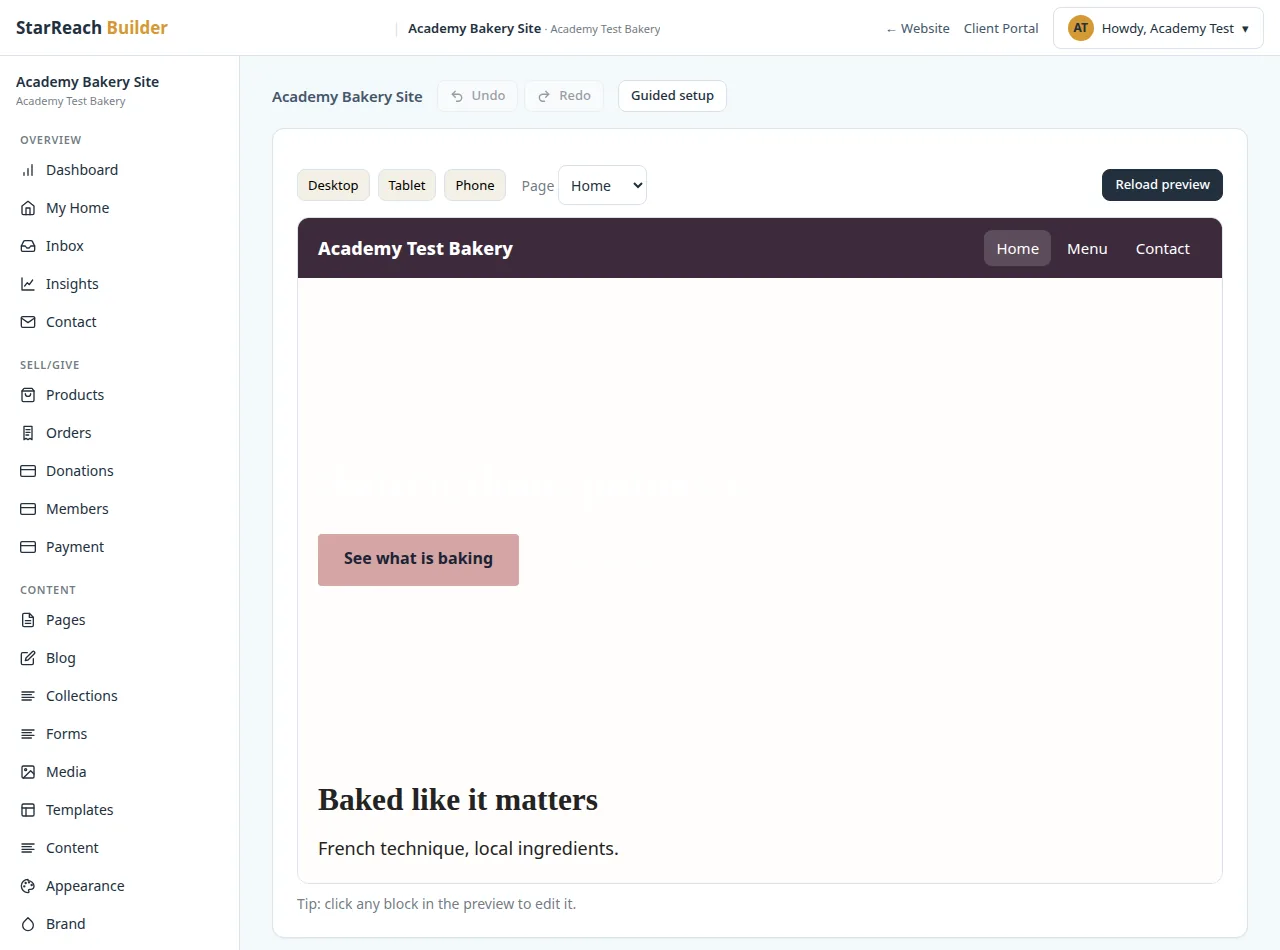
Step 9 — The editing canvas: check every page at Desktop, Tablet and Phone widths before you publish.
That is the lay of the land. The next lesson draws the one line that makes everything else click: the difference between your draft and your published site.
Try it now
Open the product and put this lesson into practice — it takes seconds.